Wednesday 21 December 2011

Week 12 - Posture & Pose

Life Drawing of Posture & Pose - 15 mins
A3 Size

This is a 15 minute sketch using pencil. The aim in this drawing was to draw the model showing the balance of weight and where the weight lies on the model to hold himself up. The models pose shows the weight lays in the right shoulder, arm and hand. I paid attention to detail within the muscles and joints of the body. This models pose showed the majority of all his weight laying upon the right side of his body making me able to sketch where the pressure lay in his elbow and his right shoulder bone. I shaded in some areas to show this detail however, I would have liked to have been able to get in a lot more detail as this was the main point of weight in this models pose.

The posture in this models pose is quite closed as most of his body is tucked in apart from the arm where his weight in resting upon. Having a closed pose creates more shadows and I would have liked to have gotten more of these in to create the more detail.

This drawing is not perfect and there are some changes I would make to prove upon this drawing. The main focal point in this drawing is where the weight lays. I think I have shown the weight in the arm however, I think the arm should have been a little longer and for there to be more pressure upon the right shoulder. I also struggled with getting the right proportion and shape for the hand as it looks very flat and not very realistic. If I were to do this drawing again I would also have made the models head slightly smaller as his head is too large making his body look to small and a bit child like.


Tuesday 13 December 2011

Week 11 - Musculature


Life Drawing of Musculature - 5 mins
A3 Size

The aim of these images was to focus on the muscularity of the human form. This is 5 minute sketch of the model in a twisted position. This image shows good form as you can clearly see that the body is in a twisted in a very beautiful position. With more time I would have liked to have picked out the detail of the muscles in the body from the light and shadow.


Life Drawing of Musculature - 20 mins
A3 Size

This image was focusing on the chest and shoulders of the model. Using charcoal and a putty rubber I tried to pick out details of the muscles in this 20 minute sketch. There were definite areas of light and shadow that showed the muscle very clearly. However, I don’t think I got this entirely right as the arms look to big for the size of the body and the neck looks to long. With better proportions I think this sketch would have turned out better.


Life Drawing of Musculature - 7 mins
A3 Size

This 7 minute sketch was focusing on the lower part of the leg and the foot. I had a good vantage point as I was able to see underneath the foot where I could pick out the most detail. Using charcoal I was able to create shadows to show where the muscles were for example in the calf muscle of the back of the leg. This really stuck out as the model was tensing this part of his body. I like the detail in the models foot however; it was actually bigger than what I had drawn it. If I drew the foot bigger then the whole proportions of this drawing would have been a lot stronger.

Week 10 - Anatomy & Movement


Life Drawing of the Human Anatomy & Movement - 25 mins
A3 Size

This is a 25 minute sketch using pencil. The focus in this image was movement however there is very little movement in this drawing as the figure is sitting down in an upward, kind of stiff position. The lines in this drawing are very long and straight which create very little movement or shape. However, we also focused on gesture and in this drawing you can see the figure is confident and calm. The model is sitting up straight and looking upwards showing confidence rather than looking down at the floor.

I had a good vantage point as I was positioned looking towards the front and the side of the model which makes me able to draw his chest and face where I think the most detail lies. I was able to get some shading into this sketch to show the details of and shape of the models body.

I would have liked to have been able to get more shading into this drawing to create more detail. I would also like to change the table that the model is sitting on as I don’t believe this is the right size or shape as the model looks like he is about to fall of the edge of it.

Monday 5 December 2011

Week 9 - Basic Anatomy


Life Drawing of the Human Anatomy - 15 mins
A3 Size

This is a 15 minute sketch I drew using charcoal. The main focus in this drawing was to get the basic anatomy of a person with the shape of their body. I had a good vantage point as I was able to see all the different shapes and creases of the models body. I was able to pick out the shadows to create the illusion of creases and shape which makes up the human body.

However, there are a few problems with this sketch and one is that everything is not in proportion to each other. The upper part of the body looks a lot bigger than the lower part. Making the models whole body seem a bit out of proportion. I would also have liked to have been able to draw the whole body. However, I didn’t give myself enough room to be able to draw her lower legs and feet.


Week 8 - Reflective Surfaces


Drawing the Reflections of Various Objects - 35 mins
A3 Size


This is a 35 minute drawing of a still life set-up with reflective surfaces using charcoal. The aim in this sketch was to pick out where the reflections lay upon the objects. I chose this vantage point because I wanted to sketch from where the objects were not kissing. Many of these objects have there own space which makes it easy for me to draw what they are. However, the only problem with this vantage point is with the dark object towards the back. It is not clear what it is and it is in a bad position as it is kissing with the clear vase next to it.

The main focal point in this image is the tall diagonal object in the middle which is taller than all the other objects around it. The other objects seem to gradually decrease in size the further away from this object they get; apart from the small round object directly in the middle of the drawing. The eye is also drawn to this object as it is right in the centre.

A lot of what was reflected into the objects was the drape that they are all standing upon. This drape had patterned flowers in it which I tried to pick out in the reflection of the objects. I picked out these flowers using a putty rubber and charcoal.


Week 7 - Texture


Texture Drawing of Various Objects - 1 hour
A3 Size


This is a 1 hour sketch I drew from my own directed study using pencil. The focus in this image was on texture and I wanted to choose objects with different textures so I could get a comparison between them all. I wanted a tight composition where all the objects would be close together so that the different textures would be evident.

The main focal point in this image is the darkness of the Pepsi can and also the detail within the wicker basket. The eye is immediately drawn to these objects. This is what I wanted so that the viewer would concentrate on them and not on the blank background in the back. Having an empty background makes my drawing stand out even more.

However, this drawing is not perfect and there would be things that I could improve upon. I would have liked to have gotten more detail upon the cloth to make it stand out more like the wicker basket and I also think the shape of the Pepsi can is wrong as it is too fat and the edges are too sharp.


Week 6 - Still Life


Still Life Drawing of Plastic Flowers - 30 mins
A3 Size


This is a 30 minute sketch of an arrangement of plastic flowers using pencil. There were three light sources used in this scene; these were used to create light and shadows and pick out the details upon the flowers.

One of the flowers was taken out of the jug and placed on the table to create a vantage point that would start at the very top of the flowers and flow down to the bottom of the table where the single flower is laying. The position from where I was drawing from was very good as I had a good view of the composition of this still life set-up as it flows rights across the draped table giving me a great focal point.

To improve upon this drawing I would have liked to have gotten better form of the table as this is not a strong element of this drawing and is the wrong shape to what it originally was. The single flower laying on the table is also too big which makes the table and jug of flowers look too small.


Monday 14 November 2011

Week 5 - Landscape Drawing


Landscape Drawing from outside my Bedroom Window
A3 Size


During directed study week I travelled back home to Morecambe. I was originally planning on doing a drawing of Morecambe Bay however; the weather stopped me from doing this so instead I drew from what was outside my bedroom window. I spent a long time doing this drawing because I wanted to get in as much detail as I could. For this drawing I used biro pen. I used all the techniques I had learnt in my previous lessons and tried to combine all of them into this drawing.

 To begin with I concentrated on the perspective and the composition of the houses and the trees. With all the practice I managed to get the lines of the buildings a lot straighter which makes the whole drawing look more real to life. I also chose to draw from this Vantage point because I liked the composition with the houses and the trees. The trees fill in a lot of spaces which would have other wise been blank spaces.

 Next I concentrated on getting in the light and the shadows. Everything behind the front houses is a lot darker to everything in front of them. These must be blocking out a lot of the light which makes them look a lot darker. The focal point to this drawing is the first row of houses. These create the majority of my drawing with the roofs of the houses creating nearly a straight line going from the middle left of the page right across to the right. These houses are the form of the image and everything else around them are the objects.

 To improve upon my drawing I would have wanted to correct the central houses roof. To me it looks a little lopsided and to small for the actual house compared to the others around it.

Week 4 - Light & Shadow


Creating Light & Shadow from Drapery - 10 mins
A3 Size


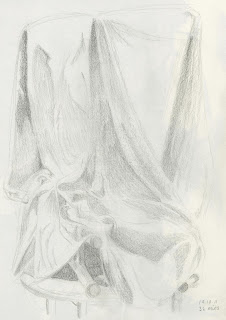
This is a quick 10 minute sketch of a piece of drapery draped over two stools and a table. Within 10 minutes I was able to get in the composition of these objects and create very minimal shading. I had a great Vantage point for this drawing as the drapery created a lot of interesting shapes that I was able to pick up on.


Creating Light & Shadow from Drapery - 15 mins
A3 Size


For this 15 minute sketch I switched positions to get a different Vantage point. With practice from my previous sketch I was able to get in a lot more shading to create the light and shadow effect. The focal point for this sketch would be where the drapery ends and creates very dark shadows in-between the drapery and the stools. Although I was able to get in more detail within this sketch and create more light and shadow I believe the vantage point for this sketch was not as good as my previous. There wasn’t as much form to go about and I had less shapes to draw with this Vantage point than the previous. This made me feel less comfortable drawing this.


Creating Light & Dark from Drapery - 32 mins
A3 Size


Now that I have had practice with two other reasonably quick sketches I went on to create a drawing where I could add more detail creating more light and shadow. Again like my other two drawings I switched positions to get a new Vantage point. Like my previous drawing I didn’t feel as comfortable with this Vantage point compared to the first. However, this Vantage point gave me a lot of shadows with the two light sources facing the back to where I was facing and also the top. This created very dark shadows towards the bottom of the drapery and also in-between the stools. The drapery creates a focal point which starts at the very top and flows down to the very bottom where the drapery ends. There are a lot of interesting shapes that the drapery creates with the light and shadow which I tried to pick up on.
Although, I had improved from my previous sketches I would have liked to have gotten in some more detail to really pick out the darkest shadows from the lightest using my pencil and putty rubber to create to overall form of this image.


Sunday 13 November 2011

Week 3 - Composition


Compositional Dawing from inside Building - 45 min
A3 Size


For this 45 minute sketch I used pencil and also a putty rubber. The main focal point of this drawing is what would be the banister. This travels straight from the middle left side of the page to the right. The eye is also drawn towards what looks like a floating staircase. The Vantage Point was really hard to draw because there were lots of little details that I tried to pick out and there were also a lot of separate objects that were made to seem like they were one single object.
In this drawing I concentrated on trying to get the form right also creating the illusion of light and dark. Like with my other Perspective drawing I struggled with getting the lines straight from free hand. In this drawing my lines still look curved which is not what I wanted. However, I did try and pick up on the shadows within this drawing and used a putty rubber to bring out the lightest parts of the drawing to make it look more real to life.
With this drawing I struggled with getting the composition right. To improve this drawing I would concentrate more on the form and getting all my lines in the correct places before adding detail to my sketch.


Week 2 - Perspective Drawing


Perspective Drawing of a Building - 1 hour
A3 Size


This drawing I did is a 1 hour sketch of one of the University Buildings. To create this drawing I used a pencil and a putty rubber to bring out the highlights in the drawing. I chose this building because of its Vantage Point. The angle of the Building is quite tricky to draw because it doesn’t just follow in one single, straight line but also goes of in different directions. I knew this would be a challenge which is why I chose this Vantage Point because I wanted to push myself.
The main focal point of this drawing is the part of the building where it comes out from the rest of the building starting from the top left of the page and finishes towards the bottom right. The eye is immediately drawn towards this part of the drawing because this part of the building spreads over the entire part of the sketch and is the largest single object present. It is also because of the dark shadow this part of the building creates drawing the eye towards it.
This sketch is not perfect but the form of this drawing creates the illusion of a building. The majority of buildings consist of straight lines and a lot of my lines a little curved and not straight in the way that a building would be. I would take more time getting there lines straight and would also have liked to have gotten a little more detail into this drawing.